A cloudy makeup mirror can make a familiar morning routine feel strangely difficult. The haze may come from dried cosmetics, soap residue, hard-water deposits, or damage to the mirror’s reflective backing. These problems can look similar, but they do not respond to the same treatment. Before you reach for a stronger cleaner, inspect the glass in daylight and check whether the cloudy area sits on the surface or appears beneath it.
This guide explores how to clear cloudy glass on an old makeup mirror with careful, low-risk steps. It covers gentle dusting, suitable cleaners, soft cloths, and ways to avoid scratching delicate glass or letting moisture seep around the edges. Small details matter. A cotton swab can reach a narrow frame seam; a rough paper towel can leave fine marks. Some cloudiness, however, comes from age or damage behind the glass. Cleaning cannot always reverse it. That is worth admitting.
A verified expert quotation would strengthen this introduction, but no source material was provided. Use this clearly marked placeholder until an attributable statement is confirmed: [Expert Name], [verified mirror-restoration or glass-care credentials], says, “[Insert an exact, sourced quotation about safely cleaning old mirrors.]” The ten methods that follow favor patience over force, explain when to stop, and help readers choose a realistic next step for a mirror they want to keep.
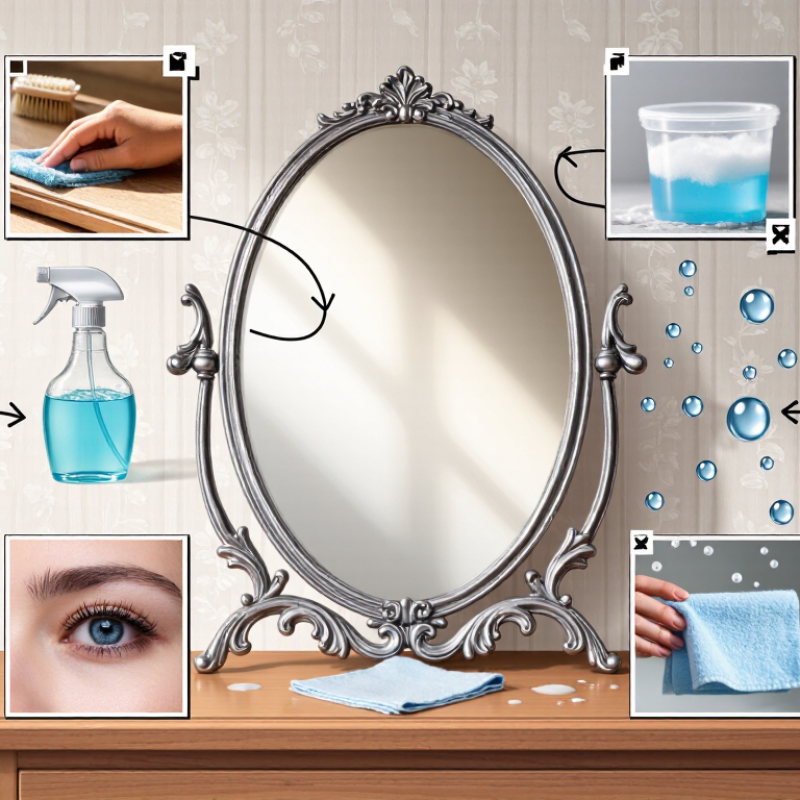
Cloudiness on an old makeup mirror can come from the glass surface or from damage behind it. Start by looking at the reflection in daylight. Smudges, powder, and dried spray often appear as a thin film. They may shift or disappear when you view the mirror from another angle. A cloudy patch that stays in the same place may point to damage in the reflective coating instead.
Check the edges and back, if they are visible without taking the mirror apart. Dark spots, pale patches, or a spreading haze near the edge can indicate moisture has reached the backing. This is common on older mirrors stored in damp bathrooms. Don’t scrub those areas harder; the coating may be fragile. Tiny scratches can also scatter light and make a mirror look dull, especially under bright vanity bulbs. Look closely.
To separate surface residue from lasting damage, wipe a small area with a clean, soft microfiber cloth slightly dampened with water, then dry it gently. If the patch remains, avoid stronger cleaners until you know how the mirror is made. A magnifying mirror can also distort light by design, so compare the cloudy area with the rest of the glass. I used to assume every haze was dirt; that’s an easy mistake. The pattern and location often tell you more than the brightness of the reflection.
Before cleaning, move the mirror to a stable, well-lit surface and check its edges for loose backing, cracks, or flaking silver. Cloudiness may come from damaged reflective backing, not dirt. Cleaning cannot repair that. Place a towel beneath the frame to catch drips, and avoid soaking the edges where moisture can seep behind the glass.
Gather a clean microfiber cloth, distilled water, mild dish soap, cotton swabs, and protective gloves. Keep the room ventilated. A CDC analysis of work-related asthma cases across 10 states found cleaning products were implicated in about 12.8% of cases, a useful reminder to avoid unnecessary sprays and strong fumes. Never mix cleaning products. Put a little diluted soap on the cloth, not directly on the mirror, and test a small corner first. Gentle pressure is enough. I’ve learned that old glass can scratch more easily than it looks, so skip abrasive pads and paper towels. If the test area leaves a haze or color on the cloth, stop and reassess; the surface may be deteriorating.
| Step | Supply or preparation | How to use it safely | Best for / important note |
|---|---|---|---|
| 1 | Soft microfiber cloth | Use a clean, dry, lint-free cloth to lift loose dust before adding any liquid. Avoid paper towels and rough fabrics that may leave lint or scratch delicate finishes. | A safe first step for nearly any mirror; use a separate cloth for drying. |
| 2 | Distilled water | Dampen a cloth lightly rather than spraying the mirror. Wipe the glass, then dry it promptly with a clean microfiber cloth. | Useful for light dust and water-soluble marks. Distilled water can reduce mineral spots from hard tap water. |
| 3 | Mild dish soap and water | Mix a small drop of mild, non-abrasive dish soap into a cup of water. Apply the mixture to the cloth, wipe gently, then wipe again with a cloth dampened with plain water and dry. | Helps remove fingerprints and light oily residue. Keep moisture away from the mirror’s edges and backing. |
| 4 | White vinegar diluted with water | For stubborn mineral film on the front glass, mix equal parts white vinegar and water. Put a small amount on a cloth, not directly on the mirror; wipe briefly, follow with a water-dampened cloth, and dry. | Can help with mineral deposits. Do not let the solution run into edges, seams, or a damaged backing; avoid contact with natural-stone surfaces. |
| 5 | Ammonia-free glass cleaner labeled for mirrors | Check the product directions and test a small, inconspicuous area first. Apply it to a cloth and clean the glass without saturating the frame or edges. | Convenient for general glass residue. Avoid cleaners with abrasive particles and products not labeled as suitable for mirrors. |
| 6 | Cotton swabs for corners | Use a dry swab to lift dust from corners and around the frame. If needed, barely dampen it and keep liquid from collecting along the glass edge. | Reaches narrow areas without flooding the mirror’s seams. |
| 7 | Soft-bristled brush | Gently brush dust from the frame, hinges, or crevices before cleaning the glass. Do not scrub the mirror surface with the brush. | Helps prevent frame dust from transferring back onto freshly cleaned glass. |
| 8 | Protective towel and stable workspace | Place the mirror on a level, cushioned surface if it can be safely removed. Otherwise, secure it in place and put a towel beneath it to catch drips. | Reduces the risk of slipping, breakage, and liquid reaching furniture or the mirror backing. |
| 9 | Edge and backing inspection | Before cleaning, look for cracks, loose frame parts, dark spots, or peeling along the edges. If the reflective layer appears damaged, avoid wet cleaning near that area. | Cloudiness behind the glass or dark edge damage may indicate deterioration of the reflective backing, which surface cleaning cannot repair. |
| 10 | Small-area test and gentle drying | Test the chosen method in a corner first. Clean in small sections using light pressure, then dry each section promptly with a clean microfiber cloth. | Helps reveal whether the haze is surface residue and reduces streaking and moisture exposure. |
Dust can make an old makeup mirror look cloudy, but a dry, soft microfiber cloth is the safest place to start. Wipe lightly in small circles, supporting the frame rather than pressing hard on the glass. Less is safer. A rough towel or heavy pressure may leave fine scratches, especially on worn surfaces.
For fingerprints and everyday film, dampen a clean cloth with distilled water and wring it until barely moist. If the marks remain, add one small drop of mild dish soap to a cup of water. Work on the glass with gentle strokes, then use a second cloth dampened with plain water to remove residue. Keep liquid away from the mirror’s edges and frame; moisture can seep behind old glass and damage its reflective backing. Dry promptly with a lint-free cloth. Don’t spray the mirror directly.
Check the result in natural light. If the cloudy patches stay in the same places after careful cleaning, they may come from deterioration behind the glass rather than surface dirt. Cleaning cannot reliably reverse that change. I used to assume every dull patch needed another wipe, but repeated rubbing can do more harm than good. Stop if the surface feels gritty or the frame is loose.
A gentle-first guide for removing dust, smudges, and everyday film.
The 1–5 ratings are a qualitative comparison of how gentle each method is on glass, not measured cleaning results. Start with dry dusting, then use a barely damp cloth if needed. Apply liquids to the cloth rather than spraying the mirror, and avoid soaking its edges or backing.
Cloudiness on an old makeup mirror may come from mineral scale, oily residue, or damage beneath the glass. They need different treatments. Mineral deposits often appear as chalky rings where droplets dried; skin oils can leave a hazy smear instead. The U.S. Geological Survey’s water-hardness classification, based on Durfor and Becker (1964), describes water above 180 mg/L as calcium carbonate as very hard. That figure cannot diagnose a mirror, but recurring spots after tap-water cleaning make minerals more plausible. A useful clue.
For suspected scale, dampen a microfiber cloth with equal parts white vinegar and water. Hold it on the glass for a minute, then wipe gently and dry. Keep liquid away from the mirror’s edges. Older backing can be vulnerable to moisture, and liquid may creep behind the glass. Never flood the edges. If the haze feels greasy, use a few drops of mild dish detergent in warm water instead; acid will not remove skin oil well. Rinse the cloth, wipe again, and dry with a clean microfiber towel.
Check a small corner first. That step is easy to skip. Avoid scouring pads, powders, and razor blades, which can scratch glass or worsen damage around worn areas. If cloudiness remains after careful cleaning, it may be deterioration in the reflective coating, not residue. More scrubbing can make that worse.
Cloudiness on an old makeup mirror may come from residue, but it can also signal damage beneath the glass. Inspect it in bright, angled light. Surface film often shows fingerprints or water marks and may change when wiped. Black specks, cloudy crescents, or peeling near the edges can indicate deterioration of the reflective backing. That damage will not polish away. A gentle test helps: wipe one small area with a clean, barely damp microfiber cloth, then dry it immediately. Don’t scrape or take the mirror apart; old frames can be fragile.
Prevent future cloudiness by using less moisture. Spray a small amount of mild glass cleaner onto a cloth, not directly onto the mirror. Liquid can seep behind the glass and worsen backing damage. Keep the frame’s edges dry, especially after cleaning, and avoid abrasive pads or strong pressure. In a humid bathroom, let the mirror air out after showers. I used to wipe too hard around the corners. It left me wondering whether the haze was dirt or damage.
Tips: Check the front and edges before cleaning. Try a hidden corner first. If the cloudy patches remain, stop polishing; repeated scrubbing may harm the surface without improving its reflection. For valuable or sentimental mirrors, ask a glass-restoration professional to assess the backing.
Check the mirror in daylight from different angles. Surface smudges may shift; a fixed patch may indicate backing damage. Look closely.
It often leaves chalky rings where water droplets dried. Recurring spots after tap-water cleaning may suggest minerals, but they are not proof.
Mix equal parts white vinegar and water. Dampen a microfiber cloth, hold it on the spot for one minute, then wipe gently and dry. Keep the edges dry.
Use a few drops of mild dish detergent in warm water. Wipe gently, rinse the cloth, wipe again, and dry with clean microfiber. Acid may not help.
Probably not. Black specks, pale patches, or peeling near the edges can indicate deterioration of the reflective backing. More scrubbing could worsen it.
Skip scouring pads, powders, razor blades, and hard pressure. They can scratch the glass or harm worn edges. Easy to overdo.
Spray mild glass cleaner onto a cloth, not directly onto the mirror. Keep the frame edges dry and air out the bathroom after showers.
If gentle cleaning leaves fixed cloudy patches, stop polishing. A glass-restoration professional can assess a valuable or sentimental mirror. I used to assume haze meant dirt; that was too simple.
Cloudiness on an old makeup mirror can come from ordinary dust and fingerprints, oily residue, mineral deposits, or damage to the reflective backing. Before cleaning, identify the likely cause and gather soft, lint-free cloths, clean water, and a gentle glass-cleaning solution. Protect the mirror’s frame and surrounding surface, and avoid soaking the edges, where moisture can seep behind the glass.
For how to clear cloudy glass on an old makeup mirror, begin with gentle wiping to remove loose dust and everyday film, using light pressure and a clean section of cloth. If cloudy patches remain, treat mineral spots or stubborn residue carefully with a suitable mild solution, then dry the glass thoroughly. Avoid abrasive pads and harsh scrubbing, which may scratch the surface or worsen existing damage. If the cloudiness remains beneath the glass or appears to come from the backing, it may be permanent rather than a cleaning issue. Regular dusting, prompt removal of smudges, and keeping moisture away from the mirror’s edges can help prevent future cloudiness.
NTC Beauty