2026 Top How to Sanitize Makeup Brushes Between Clients?

Time:2026-10-08 Author:Isabella
0%

For 2026, knowing how to sanitize makeup brushes between clients is a professional safety standard, not merely a cleanliness preference. A 2019 study published in the Journal of Applied Microbiology examined used cosmetics and applicators. It reported bacterial contamination in 70% to 90% of tested products, while beauty sponges showed especially high contamination levels. The FDA also warns that cosmetics can become unsafe when microorganisms enter products through hands, tools, or storage conditions.

The practical routine starts at the station. Remove visible pigment with a disposable tissue. Wash the brush with liquid soap and lukewarm water, keeping water away from the ferrule. Then apply an appropriate professional disinfectant, following its contact time. Do not wipe it away too early. A clean-looking brush may still carry microbes. Beauty expert Bobbi Brown has advised, “Wash your brushes once a week.” Between clients, however, weekly washing is not enough. Brushes need a client-to-client process, especially after cream products, eye makeup, or contact with irritated skin.

Professional makeup artist and educator Kevin James Bennett emphasizes, “Clean tools are essential to protecting your clients and your reputation.” That principle is simple. The difficult part is consistency. Even experienced artists can rush when schedules become crowded. I have seen how one damp brush, placed in a closed kit, can develop an unpleasant odor by afternoon. That mistake deserves reflection. Use labeled clean and used containers, allow brushes to dry completely, and replace damaged tools. No routine is perfect. A documented process makes improvement possible.
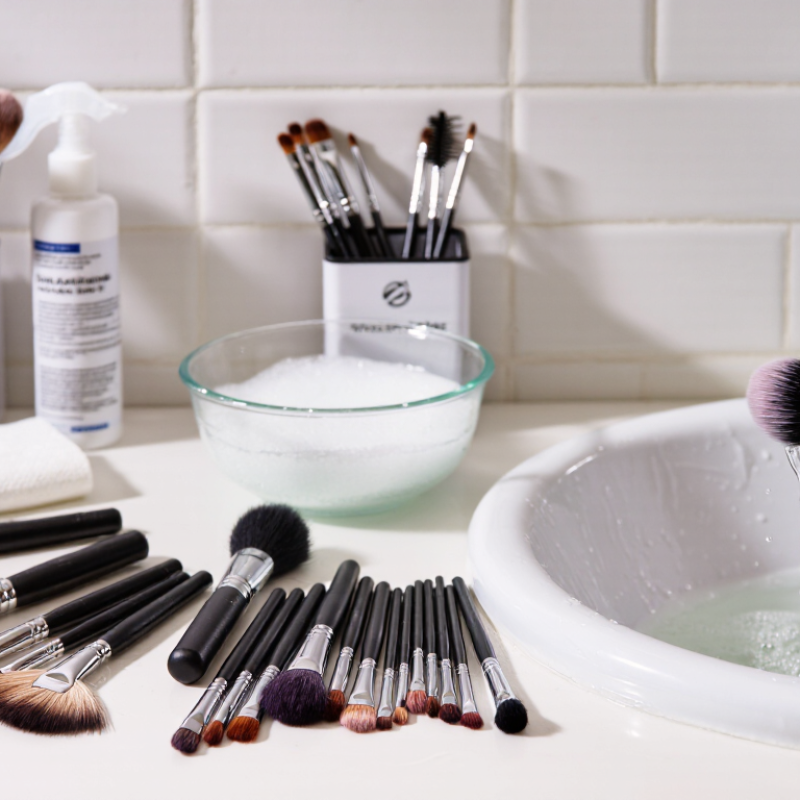
2026 Top How to Sanitize Makeup Brushes Between Clients?

Assess Client-to-Client Risks Using FDA Cosmetic Safety Standards

2026 Top How to Sanitize Makeup Brushes Between Clients?

Client-to-client risk should be assessed against FDA cosmetic safety expectations, not personal habit. The FDA does not prescribe one brush-cleaning method, but its guidance expects cosmetics to remain free from harmful microbial contamination. Under the Modernization of Cosmetics Regulation Act, responsible persons also need safety substantiation and adverse-event procedures. A visibly clean brush is not automatically safe.

Published research shows why speed matters. A 2019 study in the Journal of Applied Microbiology reported microbial contamination in 70–90% of used cosmetic products. It also found that 93% of beauty tools had never been cleaned. These figures are not a direct measurement of every salon, but they reveal a credible transfer risk. Treat each client as a separate exposure.

Use a dedicated brush for each client whenever possible. Remove visible product, wash bristles with liquid cleanser and warm water, then rinse until clear. Keep liquid away from the ferrule. Disinfect with a product suitable for cosmetic tools, following its stated contact time. Dry brushes fully on a clean, breathable surface before reuse.

Never share mascara wands, lip applicators, or cream products from a common container. Use disposable applicators instead. Record cleaning times when several clients are served quickly. That step feels excessive, sometimes. It can expose weak routines.

FDA Cosmetic Good Manufacturing Practice guidance also emphasizes clean equipment, contamination control, and documented procedures. My practical concern is simple: rushed drying can leave moisture inside dense bristles, where contamination may persist.

Prepare EPA-Registered Disinfectants and 70% Isopropyl Alcohol

2026 Top How to Sanitize Makeup Brushes Between Clients?

A professional sanitation routine begins with clean hands, fresh towels, and labeled tools. Use an EPA-registered disinfectant approved for the surface and intended use. Always follow its label, including dilution, wet contact time, and ventilation requirements.

“Wet” matters. Wiping once and letting the surface dry may not disinfect it properly.

Remove visible makeup and oil before applying disinfectant. Organic residue can reduce its effectiveness.

For metal palettes, brush handles, scissors, and other nonporous surfaces, spray or wipe the disinfectant until fully wet. Keep it wet for the required time. Then allow the item to air-dry completely. Never mix disinfectants.

Use 70% isopropyl alcohol only on compatible, nonporous tools and surfaces. It evaporates quickly, so apply enough to maintain wetness briefly.

Avoid soaking brush bristles, ferrules, or wooden handles, because repeated alcohol exposure may weaken adhesives and fibers.

Brush hair needs proper washing with cleanser, thorough rinsing, and complete drying between clients. Disinfection does not replace cleaning.

I once rushed this step during a busy appointment. The brush looked clean, but the ferrule still held foundation. That mistake changed my process.

Now I inspect every tool under bright light, especially around seams and handles.

Product labels and local sanitation rules should guide the final procedure, because requirements can differ by location.

Remove Product Residue with Soap, Water, and a 20-Second Wash

Between clients, makeup brushes need more than a quick wipe. Product residue can hold oils, pigment, skin cells, and microorganisms inside the bristles. The Centers for Disease Control and Prevention reports that washing with soap and water can reduce diarrheal illness by 30% and respiratory illness by 20%. That evidence concerns hands, but it supports careful washing for reusable tools. Remove excess makeup with a clean tissue. Wet the bristles with lukewarm water, keeping the handle and ferrule as dry as possible.

Add mild liquid soap to your palm. Work the brush in small circles for 20 seconds, reaching the center of the bristles. Rinse until the water runs clear. Do not rush this step. The U.S. Food and Drug Administration warns that contaminated cosmetics may cause harm, especially when products contact eyes or damaged skin. Press brushes gently in a disposable towel, reshape them, and dry them horizontally with the bristles extending beyond the counter edge. Never store damp brushes in a closed case.

A timer helps.

In practice, busy artists may shorten the wash when several clients wait. I have made that mistake. A second rinse often reveals hidden foundation near the ferrule. Clean hands, fresh towels, and separated clean tools strengthen the process. Inspect each brush before use, because a clean-looking surface is not proof of complete residue removal. (Sources: CDC, Clean Hands guidance; U.S. FDA, Cosmetics and Microbiological Safety guidance.)

2026 Top How to Sanitize Makeup Brushes Between Clients? - Remove Product Residue with Soap, Water, and a 20-Second Wash

Step Action Between Clients Recommended Method Minimum Time or Condition Hygiene Check
1. Prepare Wash hands and place the used brushes in a separate, washable container. Use clean hands and a clean work surface. Do not mix used and clean tools. Before handling cleaned tools. No visible makeup, tissue, or debris remains on the work area.
2. Remove Residue Loosen foundation, cream, powder, and pigment from the bristles. Rinse the bristles with lukewarm running water, keeping water away from the ferrule and handle joint. Until most visible product is gone. Water runs mostly clear and the bristles are not coated with product.
3. Wash Clean the entire brush head with soap and water. Apply mild liquid soap, work it through the bristles, and gently massage from the ferrule toward the tips. Wash for approximately 20 seconds, then rinse thoroughly. No visible residue, foam, or strong cosmetic odor remains.
4. Rinse Remove all soap from the brush. Rinse under lukewarm water while gently reshaping the bristles. Until the rinse water is clear and soap-free. Bristles feel clean rather than slippery or sticky.
5. Dry Remove excess moisture and allow the brush to dry completely. Blot with a clean, disposable towel and lay flat with the bristles extending beyond the edge of a clean surface. Use only when fully dry; drying time varies by brush size and humidity. No dampness is present inside the brush head or near the ferrule.
6. Disinfect When Required Use a suitable disinfectant only when the product label permits use on makeup tools. Follow the disinfectant label for concentration, wet contact time, ventilation, rinsing, and drying requirements. Use the exact label contact time; a 20-second wash is not automatically a disinfection claim. The tool is compatible with the product and completely dry before use.
7. Replace or Discard Remove tools that cannot be adequately cleaned or that have contacted broken skin, blood, or active infection. Use a new disposable applicator where appropriate. Replace damaged, shedding, cracked, or persistently stained brushes. Immediately when the tool is damaged or contaminated beyond effective cleaning. The tool can be cleaned, dried, inspected, and safely reused.
8. Store Protect clean brushes until the next client. Store completely dry brushes in a clean, covered container away from sinks, splashes, and used tools. After drying and inspection. Clean tools remain separated from contaminated equipment and waste.

Important: Cleaning removes cosmetic residue and many microorganisms; it is not the same as sterilization. Always follow local infection-control requirements and the instructions for any soap or disinfectant used.

Disinfect Each Brush for the Label’s Required Contact Time

2026 Top How to Sanitize Makeup Brushes Between Clients?

Between clients, brush sanitation must follow the disinfectant label, not personal estimates. Remove visible makeup first with cleanser and water. Then apply a disinfectant approved for the brush’s material and intended use. Keep every surface visibly wet for the required contact time. A five-minute label means five full minutes. Do not wipe it away after thirty seconds.

The CDC’s infection-control guidance emphasizes following manufacturer contact times for effective disinfection. Its hand-hygiene data also identifies 60% alcohol as the minimum for alcohol-based hand sanitizer. That figure does not automatically make a brush disinfectant suitable. The EPA’s disinfectant label database likewise shows that contact times vary by product and organism. Record the product, dilution, start time, and finish time after each service. I still catch myself rushing this step when the appointment schedule tightens. That is exactly when errors happen.

Tips: Use a timer beside the sanitation tray. Rotate clean brushes instead of reusing damp ones. Separate used, cleaned, and fully dry tools. Inspect ferrules and handles for makeup residue. Replace damaged brushes, because cracked surfaces are difficult to disinfect reliably. Dry brushes horizontally with bristles extending beyond the counter edge. Never seal them while damp. A clean-looking brush may still need more time.

Dry Brushes Completely and Document Every Cleaning Cycle

Between clients, brush sanitation must include cleaning, disinfection, complete drying, and written documentation. Remove visible makeup with a disposable towel before washing. Use warm water, a suitable cleanser, and friction across the bristles and ferrule. Keep water away from the handle joint. Apply an approved disinfectant according to its labeled contact time. Guessing the timing is not professional.

The CDC’s Guideline for Disinfection and Sterilization stresses that cleaning must come before disinfection. It also identifies drying as an important control against microbial survival. This principle applies to reusable makeup tools. WHO reports that proper hand hygiene can reduce diarrheal illness by 31% and respiratory infections by 16–21%. Clean hands still matter. After disinfection, place brushes horizontally on a clean, ventilated rack. Never seal damp brushes in a case. In practice, I have seen rushed drying leave bristles cool, swollen, and faintly sour. That should trigger a process review, not a silent reuse.

Tips: Record the client date, brush identifier, cleaning time, disinfectant contact time, staff initials, and drying completion time. Use a simple paper log or protected digital form. Mark brushes as “dry” only after touching the deepest bristles and checking for odor, moisture, or residue. Separate clean, drying, and used tools. Review missed entries weekly. A perfect log is unlikely, but unexplained gaps should never become normal.

FAQS

Why should each client be treated as a separate exposure?

Used cosmetics and tools can carry microbial contamination. A clean-looking brush may still hold residue near the ferrule. Treat every client separately.

What is the safest brush option between clients?

Use a dedicated brush for each client whenever possible. This reduces transfer between faces. It is not always practical, but it is the clearest control.

How should reusable brushes be cleaned?

Remove visible makeup with a disposable towel. Wash the bristles with warm water and suitable cleanser. Rinse until the water runs clear. Keep water away from the handle joint.

Does disinfection replace washing?

No. Cleaning must come before disinfection. Makeup and oil can reduce disinfectant performance. Washing removes residue that disinfectant may not reach.

How should disinfectant be used on nonporous tools?

Choose a disinfectant approved for the tool and intended use. Follow its label, including dilution and wet contact time. Keep the surface visibly wet. Never mix disinfectants.

Can 70% isopropyl alcohol be used on every makeup tool?

No. Use it only on compatible, nonporous tools and surfaces. Avoid soaking bristles, ferrules, and wooden handles. Repeated exposure may weaken fibers or adhesives.

How can staff confirm that brushes are fully dry?

Place brushes horizontally on a clean, ventilated rack. Check the deepest bristles for moisture, odor, or residue. Do not seal damp brushes in a case. Damp storage is a weak routine.

What information should a sanitation log include?

Record the client date, brush identifier, cleaning time, contact time, staff initials, and drying completion time. Separate used, drying, and clean tools. Missed entries should trigger review, not silent reuse.

What common mistake can increase client-to-client risk?

Rushed drying can leave moisture inside dense bristles. A brush may look clean under normal lighting. I once underestimated this step. Bright-light inspection would have caught the problem.

Conclusion

Learning how to sanitize makeup brushes between clients requires a consistent, safety-focused routine. Begin by assessing the potential risk of product buildup, skin contact, and cross-contamination in line with cosmetic safety principles. Remove visible makeup residue with soap and clean water, working the cleanser through the bristles and washing for at least 20 seconds. Rinse thoroughly without soaking the handle or ferrule unnecessarily.

After cleaning, apply an EPA-registered disinfectant suitable for cosmetic tools, or use 70% isopropyl alcohol when appropriate for the brush material. Ensure every surface remains visibly wet for the full contact time stated on the product label; wiping too soon may reduce effectiveness. Rinse only when the instructions require it, then reshape the bristles and allow each brush to dry completely in a clean, well-ventilated area before reuse. Finally, document every cleaning and disinfection cycle so staff can maintain a reliable, repeatable hygiene process between clients.

Isabella

Isabella

Isabella is a dedicated marketing professional with a sharp focus on driving brand growth and engagement through strategic content creation. With an extensive background in digital marketing, she combines her passion for storytelling with her keen understanding of industry trends to deliver......