How to Mount a Vanity Mirror Without Damaging Walls?

Time:2026-11-17 Author:Oliver
0%

A vanity mirror can make a small bathroom feel brighter, but one misplaced hole can leave chipped paint, torn drywall, or an unwanted repair. Learning how to mount a vanity mirror without damaging walls starts with the wall itself: identify whether it is drywall, plaster, tile, or masonry before choosing a fastener. Then check the mirror’s weight, mounting hardware, and the position of nearby studs. Small details matter. A pencil mark, a level, and a strip of painter’s tape can help prevent scratches and keep the mirror straight.

Bathroom renovations are a substantial home-improvement category. Houzz’s 2024 U.S. Bathroom Trends Study tracks homeowners’ remodeling choices and spending, offering useful context for projects where careful planning can protect a renovation investment. Still, no report can tell you which anchor suits your particular wall; the manufacturer’s instructions and the wall’s condition must guide that decision. Measure twice. Drill only when you are sure.

A trustworthy expert quotation also needs a verifiable source. No article or interview was supplied here, so I can’t responsibly attribute a direct statement to a named mirror-mounting professional. Before publication, verify the expert’s name and exact words against an original source. That small caveat matters: confident advice is not necessarily reliable advice. This guide focuses on practical, low-impact mounting methods, while recognizing that delicate plaster, heavy mirrors, or uncertain wall conditions may call for an experienced installer.
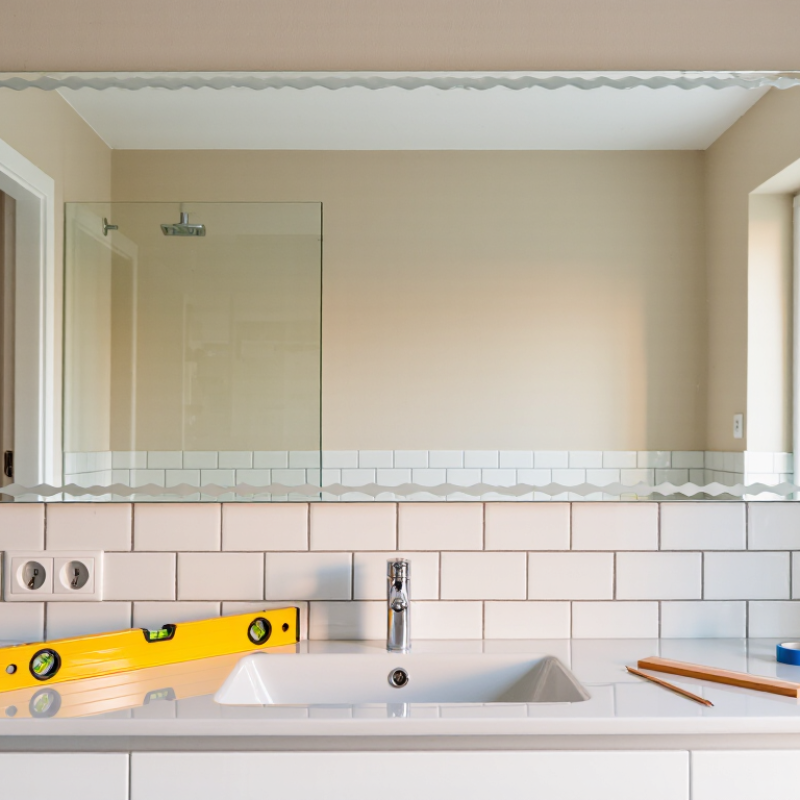
How to Mount a Vanity Mirror Without Damaging Walls?

Assess the Mirror, Wall Surface, and Weight

Start by checking how the mirror is built. A framed mirror may have D-rings, a wire, or keyhole slots, while a frameless one may need dedicated clips. Look at the back before choosing hardware. Small details matter. A wire and two wall hooks distribute weight differently from a single central bracket.

Weigh the mirror, including any attached shelf or lighting, and check the wall where it will hang. A stud finder can help locate framing behind drywall; plaster walls may need a different fixing method. Drywall alone is not automatically strong enough for a heavy mirror. Use anchors rated for the mirror’s full weight, and follow their installation directions. Do not guess. Adhesive strips can seem convenient, but dust, paint condition, humidity, and the mirror’s backing affect how well they hold. I might be tempted to choose the least visible option, yet a secure fixing matters more than hiding the hardware. If the wall feels loose or the mirror is unusually heavy, pause and ask a qualified installer to assess it. That small check can prevent chipped paint, cracked plaster, or a fallen mirror.

Choose a Wall-Safe Mounting Method

Choose a mounting method based on the mirror’s full weight, not its appearance. The National Glass Association’s glass-weight chart estimates 1/4-inch glass at about 3.3 pounds per square foot. A 24-by-36-inch mirror therefore weighs roughly 20 pounds before adding its frame or hardware. That estimate is not a safe working limit.

For a truly wall-safe setup, use a mirror with a weighted countertop stand, or a support that rests on the vanity. No drilling. If you prefer adhesive mounting, check the maker’s stated capacity for mirrors and humid rooms, and confirm it suits your wall finish. Clean, dry, smooth surfaces matter; textured paint and wallpaper can weaken adhesion or peel away during removal.

I would be cautious with heavy glass on removable strips, even when the package rating seems generous. Weigh the assembled mirror, follow the specified number and placement of pads, and leave it undisturbed for the required curing time. The glass-weight estimate excludes frames, and bathroom humidity adds uncertainty. When the wall finish is delicate, a countertop-supported mirror is the less risky choice.

How to Mount a Vanity Mirror Without Damaging Walls

Choose a wall-safe mounting method: the chart compares the typical number of wall holes required by three common setups.

How to read this: Fewer holes mean less wall penetration, but adhesive is suitable only when the product is rated for mirrors and the mirror’s weight and wall surface are within its specifications. Setups vary by mirror and hardware.

Gather Materials and Prepare the Surface

Gather a tape measure, level, pencil, stud finder, screwdriver, and the mirror’s specified mounting hardware. Check the mirror’s weight before choosing fasteners; adhesive strips are not a safe substitute unless they are explicitly rated for that mirror and wall surface. A drop cloth catches dust and protects the vanity. Keep it simple.

Inspect the wall for loose paint, cracks, or damp patches. A fastener cannot hold reliably in a weak surface. Mark the mirror’s intended position lightly, then use a level to check the line and a stud finder to locate framing. Measure twice; small marks are easy to misread. Clean the area with a soft cloth and mild soap, then let it dry fully. Avoid abrasive pads, which can scratch paint or leave a rough patch. If the paint is fresh, wait until it has cured according to its label before applying removable hardware. One detail I would recheck is clearance from faucets and cabinet doors; it is easy to overlook. For a heavier mirror, use hardware suited to the wall and its weight, and ask a qualified installer if the surface or mounting method is uncertain.

How to Mount a Vanity Mirror Without Damaging Walls? - Gather Materials and Prepare the Surface

Material or Tool Purpose Surface Preparation or Check Damage-Prevention Tip
Tape measure and pencil Measure the mirror and mark its intended position. Check that the chosen spot is clear of switches, outlets, and fixtures. Use light pencil marks that can be erased; avoid permanent markers.
Level Keep the mirror straight during positioning and installation. Confirm the reference line is level before attaching any hardware. Make alignment marks with low-tack painter’s tape instead of drawing a long line on the wall.
Stud finder Locate framing behind drywall when the mounting method requires screws. Scan the intended area and follow the device instructions; check for possible wiring or plumbing before drilling. A stud-mounted screw can support a secure installation with fewer holes than multiple unsupported fasteners.
Soft cloth and mild cleaner Remove dust, grease, and residue from the mounting area. Clean according to the wall finish’s care guidance, then let the area dry completely. Test cleaners in an inconspicuous spot; harsh solvents can dull or damage paint.
Painter’s tape Temporarily mark the mirror outline or protect nearby areas while measuring. Check that the paint is firmly bonded and the surface is not freshly painted or flaking. Use low-tack tape and remove it slowly; even painter’s tape can lift weak or uncured paint.
Mirror mounting hardware or mirror-rated removable system Support the mirror using a method suited to its weight, backing, and wall type. Check the mirror’s weight and the hardware’s stated capacity, surface compatibility, and installation instructions. Do not assume ordinary picture strips are suitable for mirrors. Adhesive systems may be unsuitable for textured, dusty, damp, or delicate surfaces.
Small level area and dry wall surface Confirm the wall is ready before fitting hardware or adhesive. Avoid loose paint, wallpaper seams, damp patches, and visibly uneven or crumbling areas. Repair or choose another location if the surface is unstable; removing a mirror from weak paint or wallpaper can cause damage.

Before installation, verify that the mounting method is approved for the specific mirror and wall surface. Follow its load limits and curing or waiting instructions; when in doubt, use a mechanical fixing suitable for the wall type.

Attach the Mirror Using Removable Supports

Removable supports can hold a vanity mirror without drilling, but only when they suit the mirror and wall. Check the mirror’s weight, then choose supports specifically rated for mirrors and your wall surface. Ordinary picture strips may not be strong enough. Bathroom humidity can also weaken some adhesives.

Clean the mounting area as directed, and let it dry fully. Dust, soap residue, and textured paint can prevent a reliable bond. Mark the mirror’s position with a level before attaching anything. Place the supports evenly, press them firmly, and wait for the recommended setting time before hanging the mirror. Follow the support maker’s load limits; do not assume several strips automatically make an unsafe setup secure.

A firm first press proves little. Gently test each support before letting go, and check the mirror regularly, especially after steamy showers. If an edge lifts or the mirror shifts, remove it at once. Adhesive may also pull paint when removed, so “removable” does not always mean damage-free. For a heavy glass mirror, a freestanding option may be safer than relying on adhesive alone.

Check Stability and Protect the Wall Over Time

A vanity mirror can feel secure on installation day and still loosen months later. Steam, repeated door slams, and small bumps can gradually work a fixing free. Check the mirror again after hanging it, then inspect it periodically. A faint rattle matters. Do not rely on the drywall alone for a heavy mirror; anchor into a wall stud when possible. The 2021 International Residential Code’s framing table lists stud spacing at 16 or 24 inches on center, depending on conditions. Measure before drilling, since the nearest stud may not sit where you expect.

Use a level, suitable fixings, and the mirror maker’s stated weight limits. If the mirror has a mounting rail, make sure it sits flat and every required screw is installed. Gently test the lower edge with your hand; stop if the mirror shifts or the wall surface dents. A small gap behind one corner can put uneven pressure on the glass and hardware. Add soft protective pads only where the design allows, and keep them clean and dry. Recheck the fasteners after a few weeks, then during routine bathroom cleaning. One detail is easy to overlook: tightening a loose screw too hard can crush drywall rather than improve the hold. If the wall feels soft or damaged, remove the mirror and repair the mounting point before rehanging it.

FAQS

What should I check before hanging a vanity mirror?

Check the mirror’s weight, back, and mounting points. Framed mirrors may use D-rings, wire, or keyhole slots. Frameless mirrors may need dedicated clips. Small details matter.

Can I hang a heavy mirror directly on drywall?

Drywall alone may not support a heavy mirror. Locate a wall stud when possible, or use anchors rated for the mirror’s full weight. Do not guess.

How can I find a wall stud?

A stud finder can help locate framing behind drywall. Measure before drilling; the nearest stud may not be where you expect.

Are adhesive strips a good choice for a bathroom mirror?

They may seem convenient, but dust, paint, humidity, and the mirror’s backing affect how well they hold. I might be tempted by hidden hardware, but secure support matters more.

How do I make sure the mirror sits evenly?

Use a level and install every required screw. If one corner sits away from the wall, pressure may fall unevenly on the glass and hardware.

How can I check that the mirror is secure after installation?

Gently test the lower edge by hand. Stop if the mirror shifts or the wall dents. A faint rattle matters.

How often should I inspect the fixings?

Check the mirror after hanging, again after a few weeks, and during routine bathroom cleaning. Steam and repeated door slams can loosen fixings over time.

What should I do if the wall feels soft or a screw is loose?

Remove the mirror and repair the mounting point before rehanging it. Tightening a screw too hard can crush drywall. I would pause and reassess.

Conclusion

Learning how to mount a vanity mirror without damaging walls starts with checking the mirror’s weight, size, and hanging points, then identifying the wall surface and its condition. Choose a mounting approach suited to both, such as removable supports designed for the mirror’s weight, rather than relying on a method that could leave marks or pull away paint. Gather the necessary materials and clean and dry the mounting area so the supports can adhere properly.

Attach the mirror according to the support instructions, taking care to position it evenly and avoid placing unnecessary strain on the wall. Once it is in place, check that it feels stable and sits securely. Periodically inspect the supports and surrounding surface, especially if the room is humid or the mirror is used often. Careful preparation and occasional checks can help keep the mirror secure while protecting the wall over time.

Oliver

Oliver

Oliver is a seasoned marketing professional with a wealth of expertise in driving brand awareness and engagement. With a deep understanding of our company's product offerings, he consistently delivers high-quality content that enriches our professional blog. His insights not only shed light on......